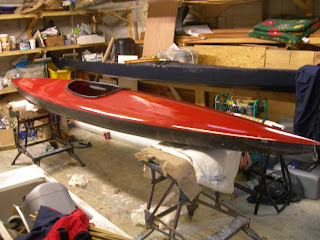
Rolled seams on a Skin on Frame Kayak
The Rolled Seam
At the end of the previous post I had described why I use this seam instead of a more simple less time consuming one and this photograph showed the start of a seam, with all of the components in the picture: the map pins to hold the two sides in place, and the core braid around which the fabric is curled. I will restrict this post to setting up the seam, and sewing will be covered in the next.
What you need
The pins are office map pins. I generally buy them online. The only ones that have worked for me are the largest with a flat hexagonal top with a disc of white paper stuck on. Although the pin is obviously steel, the rest is plastic. The smaller cheaper ones that do not have the wide hexagonal top, never stay in because their pin is not long enough. It is worth buying alot as they break quite easily.
The next photo shows the chord at the centre of the seam. The one on the left with the twist is upholsterers piping chord. This is the easiest to use as it is made for the job. It is not expensive, but is not generally available other than from upholstery suppliers. The braid
on the right is not quite so good. Sold in my local hardware shop as "Chanderlier Chord"(20p/metre) I used it as I did not have the time to drive to Truro to buy more piping chord. I have used a lot of different cores and have always managed to produce a satisfactory seam.
The other thing you need is not shown on the photograph, and that is a surface to which you will pin the two halves of the seam temporarily until it is sewn. I design wide deck stringers into my kayaks and try to make them of cedar, as that takes and holds a pin well. Although it is pliable I simply use a bigger section, even going as wide as an inch and a half near the centre, tapering towards the ends. Traditionally built Greenland kayaks have no deck stringers and so a temporary batten has to be held in place for a rolled seam, which is a fiddle.
Starting the Seam
I start off by placing the cockpit hoop where it should lay and make pencil marks where the inside edge crosses the two halves of the fabric to be joined. This is where the seam will start. Then I cut a length a length of core rope, something like three feet longer than the length of the seam. Perhaps until one is sure of the length it is best to cut one and a half the length of the seam. The rope shortens as it is twisted into the fabric.
Taking one side at a time I lay the fabric flat across the deck stringer, and then starting just inside the pencil marks, I lay down the beginning of the core rope, leaving a little spare towards where the centre of the cockpit will be. That is the situation in the photo at the top of the page. What is missing is my other hand which held the camera.
Facing the deck stringer, between the thumbs and forefingers of both hands I hold the rope on top of the fabric and twist towards me. It will become apparent as you do it. Quite often it is hard to get started, but soon enough you will have a tube of fabric rolled around the core. With this you can pull as hard as you want on the fabric, but remember you must pull perpendicular to the deck stringer not the gunwale, or towards the ends of the boat. Otherwise you will end up with fabric gathered at the ends of the seam. (This is my experience - I had to re-do a seam on my last boat). When you have six inches or so of tube it can be pinned:
Don't forget to remove the thumbtacks holding the fabric to the edges of the gunwales as you advance the seam, I generally try to remove them from the section I am about to do, but don't always remember, so it cannot be that important, unless of course they are on the top and distort fabric that has some camber.
Then you do the same on the other side and pin that down, I try to advance each set of pins past
the other so that there is some evenness in the order in which I tension the fabric. When things are going well and the pins stay in, you can pin out quite a length before sewing as below:
Things start to get a bit more difficult as you approach the ends of the kayak. This will be dealt with in next post. If you can get the book - which I understand to be out of print, you will find this method detailed in Robert Morris' book "Building Skin on Frame Boats". It is his method that I have used here. Where we differ is in the sewing method, which will also be covered in the next post.


Comments
Post a Comment