Putting the Skin on the Frame
Fabric
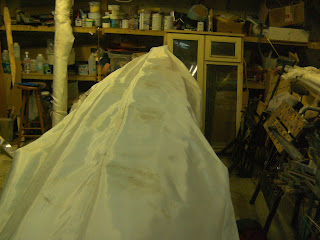
Although I could cover kayaks in PVC impregnated Polyester, canvas or nylon, I prefer to use polyester fabric ex loom, i.e it has not been treated much. Although not as strong as nylon, is does not sag through water absorption as nylon can. It is all I have ever used, apart from canvas which was not strong enough for me and did not prove a good option a boat left outside in the rain - it rotted.

Although I normally use 13oz fabric, I will be covering the Alacrity in some 8 oz (shown above folded double) which had been hanging around the workshop for about ten years and never been used, though I did give some away once.
I was given it free as it was badly mildewed. It will be perfect for the boat under reconstruction which is overweight by about four kg, is for my own use and demonstration, with an opaque finish that will not show the staining. I am looking forward to trying it out.
 The last thing I did with the frame was to measure its circumference at marked intervals along the keel, including following its shape right round the bow to the nose. At the stern it was measured to where I had decided to end the seam that will go up the rear stem, with an allowance for the extra length required by that. This all ended up in the notebook above, divided by two, and about 2" added.
The cloth on which it sits is folded in two so that when the half section is cut, the two halves will fold out to a full one either side of the central crease.
 Here you can see the cut being made with some Kevlar shears; they cost me about £25 a few years ago and were one of the best investments I made. I then sealed the edges with a heat gun, rolled it up
 and started to unroll it onto the upturned boat, still double, and making sure it was the right way round. You can see where I have covered the buoyancy bags with bubble wrap (it was all I had), to prevent the possibility of them sticking to the fabric when it is coated with epoxy.
 This was then clamped with the fold line in the centre of the keel stringer and a start made to laying the other side across.
 When laid all the way out the clamps can be taken away and then the centre marked with a series of dots. Once happy with fabric being centred properly I started the seam at the stern-post with pins.
 The cloth was removed and the seam sewn in by hand (I had intended to do it with a sewing machine but it was not working); then returned to the frame, stretched a bit, pulled down at the stern and given a little extra security with a couple of pins in the top stern corner of the deck.
Although a seam is needed at the stern, the bow has been given sufficient rake to avoid one there. However to enable the fabric to drape without puckers it is necessary to put a lot of longitudinal tension into the fabric. Never happy with the traditional way of putting one's foot against the first deck beam, heaving and putting your back out, I do this instead:
I roll the spare fabric round a piece of batten, a little longer than the width of fabric you have at the end.
 Using both hands I then turn the batten like a windlass against the tip of the nose.
 I have always gained much more tension this way with much less effort. Holding the batten in place with one hand I then put in several thumbtacks (not staples - they cut the fibres) right round the curve of the bow.
You will have to see that in the next post as I have run out of space for photos.
Although I could cover kayaks in PVC impregnated Polyester, canvas or nylon, I prefer to use polyester fabric ex loom, i.e it has not been treated much. Although not as strong as nylon, is does not sag through water absorption as nylon can. It is all I have ever used, apart from canvas which was not strong enough for me and did not prove a good option a boat left outside in the rain - it rotted.

Although I normally use 13oz fabric, I will be covering the Alacrity in some 8 oz (shown above folded double) which had been hanging around the workshop for about ten years and never been used, though I did give some away once.
I was given it free as it was badly mildewed. It will be perfect for the boat under reconstruction which is overweight by about four kg, is for my own use and demonstration, with an opaque finish that will not show the staining. I am looking forward to trying it out.

The cloth on which it sits is folded in two so that when the half section is cut, the two halves will fold out to a full one either side of the central crease.


Although a seam is needed at the stern, the bow has been given sufficient rake to avoid one there. However to enable the fabric to drape without puckers it is necessary to put a lot of longitudinal tension into the fabric. Never happy with the traditional way of putting one's foot against the first deck beam, heaving and putting your back out, I do this instead:
I roll the spare fabric round a piece of batten, a little longer than the width of fabric you have at the end.


You will have to see that in the next post as I have run out of space for photos.
Comments
Post a Comment