The may be last paddle
To recap
Apologies for the lack of posts. The paddle is now finished but I will start where I left off:
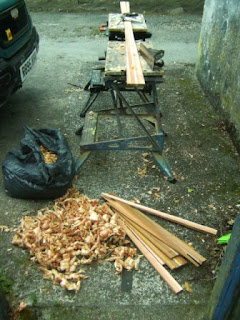
This picture shows just how much wood had been removed at quite an early part of the process. More was taken away when the outline was cut on the bandsaw.
The shape was traced round a cheap 3mm ply template cut to the shape of the paddle. Once you have drawn a few, you can generally adapt what you have without making a new one.
The actual curved shape of the paddle is carved accurately by first of all planing to chine lines drawn on the paddle. The edges are shown first:
Then the faces of the blades:
I normally use Chuck Holst's chine lines which are accessible on the Qajaq website; however as I wanted this paddle to pull well at the catch I modified them to give a flat area at the tips. Before planing to the lines I cut the recesses to take reinforced epoxy filler at the tips:
It was finished off with a Japanese saw rasp which works really well - you can get them from Axminster. The next pic shows the smoothing plane with which I started sitting on the blade face. I was about to plane across the corner nearest to the two nearest lines to that corner:
To produce a new angled face that can just be made out with difficulty:
I had to remember to take the lines round the tips. The only way I have been able to do this has been
by eye. After beginning the taper at the tip of the paddle I realized that I would need a bit more "V" near the tip, so I modified the chine lines accordingly. Incidentally this was the first time I used curved lines.
Which gave a shape like this:
As the epoxy at the ends would have to be shaped just like the rest of the paddle, the recesses were then filled:
This photo was taken before the epoxy had set. You can see the backing piece of scrap paddle holding up the masking tape. I will show how it set, and then the rest of the shaping progressed in the next post.


Just found your website and blog, and have enjoyed reading it!
ReplyDelete