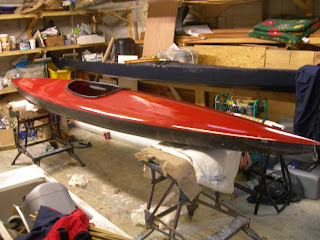
Finishing the frame
Adding the stringers
Starting with the keel stringer, with each addition the form gains more "3 D" , so that by the time all are fixed in place you can really see what shape you have produced. So far it has always been a pleasant surprise; plans detail potential, but they are not truly real like something you can hold. It is exciting to see a shape coming out.
First of however I had to finish the metamorphosis of the stern piece to the deeper larger shape of the new design.
You can see the original piece beneath and the frame at the front to centre and stabilize the whole assembly, where you can also see the securing dowels. Then it was faired and sanded, the photo shows the lines to plane to etc.
The biggest difficulty with the keel stringer is getting it straight, that's why it is worth having really good stock that is straight - and is kept that way until needed. In this case I re-used the original which was kind of straight and so I had all of the bother of making micro adjustments by eye.
As the original boat was out from centre by 1/8" I also had to make some fine adjustments in the keel slots of the frames to find a compromise of "straight" that was acceptable. This would not have been much of an issue with steamed frames. I have a way in mind to remedy this without reverting to a strong-back through the use of a flexible support on top of trestles. This is how I will build my next SOF boat and will be the subject of a series of future posts.
With regard to securing the stringers at the bow and sternpieces I have found nothing better than simply cutting the angles by eye, whilst making the adjustment for the change in angle after the cut. It is a matter of practice and if one starts out too long then there is room for another go or two to get it right. Finishing off with a block plane is also helpful. Furthermore it is not a disaster if each stringer does not end up completely flush.
They are best lashed and pegged.
Although I started off replicating the grooves in the keel stringer to keep the bump as little as possible - as can be seen above, I drilled a 1/8" hole in the rest. I think this is stronger and gives a smoother hull. The issue is not resistance through the water but the potential for the fabric to wear around a bump. Thus I subsequently drilled holes in the keel stringer too.
Then it was simply a matter of cutting 1/4" thick strips that made up the seat and lashing them between the two centre frames. I have found these sprung seats really comfortable as they adjust to your shape. I forgot to photograph doing it but the one below gives some idea.
Above you can also see the reinforcements added to the centre frames. I hadn't cut them with sufficient width. All that remains is to add the fixings to take the webbing for the back-strap.
Above can see how I have tried to address the too fine bow section by taking out the lines underwater
I will oil with "Hydrosol" woodsealer by Burgess Marine. Next post - covering.


Comments
Post a Comment