Building the Bow and Stern ends of a Skin on Frame Kayak
An easier way of building the bow area of a skin on frame kayak
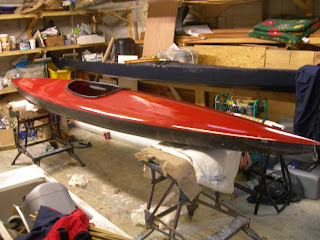
I rebuilt the bow of the Alacrity by developing a much more simple way of connecting the stem plate to the gunwales. The first photo shows the bow of a greenland kayak, similar to the original Alacrity. See how the stem plate or piece was lashed beneath the joined gunwales.
Below is the new bow. Instead of being lashed beneath the gunwales, it simply slots in to a plate that joins the gunwales together.
For clarity, a separate picture of the horizontal bow plate (the winding sticks on top were being used to ensure there was no twist):
Introduction
I had found the system used for making traditional Greenland boats to be fiddly, time consuming, easy to get wrong or misaligned, and resulted in a concave bow plan, which although fine for a Greenland styled kayak, was not often what I really wanted in a design.
For an alternative I turned to the Aleut: superb marine engineers in wood and skin. They realized that if you did not join one gunwale directly to the other, but instead by a horizontal plate into which the stem piece would slot, then far more design possibilities opened up.
Jeff Horton was clearly influenced by this approach in his book: "Fuselage Frame Boats". The stern of his kayaks comprise two plates, vertical stern-piece and horizontal plate which slot together and then fit into a nearby frame.
However in order to incorporate this into the plans of the Lowen (I plan to offer them for sale in 2018) I needed to build a boat in this way. Not wishing to go through the whole process the best alternative was to rebuild a boat which needed re-vamping - the Alacrity.
What I did
After stripping the original kayak, removing the ribs, stringers and bow stem plate, trimmed the gunwales by a few inches and planed down most of the raised area on top. I measured the dimensions of the remaining frame as accurately as possible, fed them into the "Freeship" programme and designed a new boat.
From this came the shape of the new stem peice
Freeship doesn't actually produce plans, but the necessary foundation to enable that to happen using TurboCad. The image was pricked through the paper plan on to the laminated plate.
Also produced was the shape of the bow plate
Again laminated from cedar - here you can see the slot to take the stem piece being cut.
And here so you can see the 13deg bevel for the gunwales (the sticks were checking for twist).
Below you can see how the stem piece slots in from underneath.
A space must be cut between the gunwales to give enough space for the stem
piece.
Which fits as shown
The frame which secures the end of the piece will remain. The one in between removed once the lashings are in place.
The next post: installing frames.


Comments
Post a Comment