Are these new ideas for a Kayak Hatch?
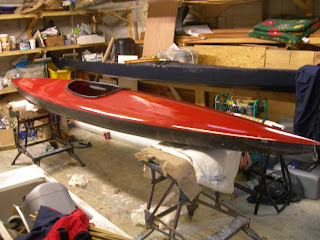
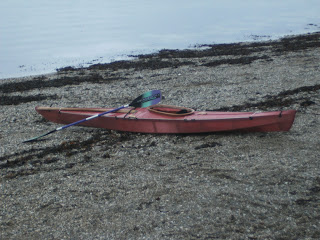
Hatches for the Retro-Slalom Kayak
When I showed my wife one of these pictures she said: "well, um it looks like something a bit medical" (which people would definitely not want to know about).
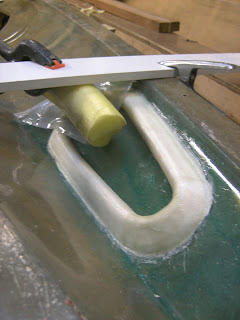 This shows the beginnings of the recess of the hatch, in place on the inside of the (fore) deck mould of the slalom kayak I purchased in January. You can see that the area has been coated with (blue) PVA release agent so that the moulding can be removed and finished off. This will then be used as a temporary plug for that particular part of the deck when the deck is laminated. It is shaped from a nice piece of dense polystyrene that I had and coated with glass & epoxy.
The yellow piece of foam is holding down the centre of the back end to stop it rising too much off the surface.
 The stern hatch recess: the photograph below is looking forward towards the cockpit. The piece of yellow foam the appears there is the beginning of the extension at the rear of the cockpit by 12 cm or so to convert it to a keyhole.
 The shape of the hatches
What is not apparent at this stage is that the inside edges should be slightly below deck level, so that the rim when added would end up protruding slightly above.
The shape follows that of the deck so that they are a couple of centimetres narrower at the bow/stern ends and wider towards the centre. They have the letterbox shape to enable large items to load through comparatively narrow openings. I have gone for this option rather create a wider hatch in the centre so as to preserve the lines of the deck, (I do not like the way that conventional hatches distort a top line). Although it would be possible to do the same with a centre hatch it would be much more difficult.
I will explain the simplicity of sealing these unusually shaped openings in the next post.
When I showed my wife one of these pictures she said: "well, um it looks like something a bit medical" (which people would definitely not want to know about).

The yellow piece of foam is holding down the centre of the back end to stop it rising too much off the surface.


What is not apparent at this stage is that the inside edges should be slightly below deck level, so that the rim when added would end up protruding slightly above.
The shape follows that of the deck so that they are a couple of centimetres narrower at the bow/stern ends and wider towards the centre. They have the letterbox shape to enable large items to load through comparatively narrow openings. I have gone for this option rather create a wider hatch in the centre so as to preserve the lines of the deck, (I do not like the way that conventional hatches distort a top line). Although it would be possible to do the same with a centre hatch it would be much more difficult.
I will explain the simplicity of sealing these unusually shaped openings in the next post.
Comments
Post a Comment