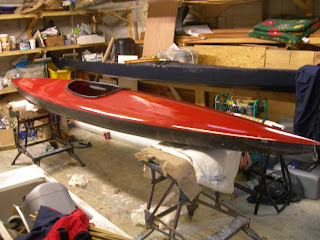
Deck fittings on a skin on frame kayak
One other thing first - wear strips
Prior to this boat I had made wear strips of wood screwed in through the fabric into the keel, and then in the later boats finished the wood with a glass/epoxy strip on top. This time I dispensed with the wood and laminated a glass epoxy strip straight onto the keel and also the two chines at their lowest point where they are likely to take the ground. The strip on the chine is easiest to see.
The strips are simply a double layer of 6oz glass. The hull was protected with masking tape when they were laminated in place.
Deck fittings
All of my early boats leaked. This was because I fitted deck lines the traditional way of drilling a hole through the gunwale, securing the line with a stop knot on the inside and taking the line through a hole in the skin. Sooner or later the seal on this hole would fail and small amounts of water would enter through them each time they were immersed: i.e. frequently when paddling through waves. Although the eight holes or more through the skin were unlikely to be all leaking at once, just one or two would be sufficient to give an uncomfortable slop round the seat.
These days I secure deck lines to webbing loops secured by plates screwed through the skin into the gunwale with gauge 8 machine screws of a length just short of the width of the gunwale plus the thickness of whatever you are screwing through. You can just see the sealant oozing out from behind
the plate, excess is cleaned with iso-propanol. The holes that took the screws had been drilled a touch too large and then their interiors coated with thickened epoxy the day before. Although you can buy plastic or stainless steel webbing plates from chandlers I laminated mine up with chopped strand mat, cloth and polyester resin in the form of long strips which were then cut to size and drilled etc.
The were loops sewn to size according to function etc.
They can be mounted at an angle to take the perimeter line across the foredeck near the bow. This crossover has the dual function of providing a paddle park, the raised fabric seam at the centre giving a little height under which the end of a greenland paddle can be pushed.
As shown below (if you click and blow up the picture - apologies)
You can also sew lines to the webbing as I have for the bow and stern toggle fittings:
and together:
Greenland paddles can be secured to the boat with the lines and toggles shown in the following picture. These are taken through webbing loops instead of the traditional method of a hole through the gunwale.
There will be some modifications in this area, following feedback from the launch which is dealt with in the next post.


Comments
Post a Comment