Fitting the deck-beams part 2
Marking and cutting the tenons
What is described below is what works for me. There are alternatives such as the elegant one described by Chris Cunningham in his book on Building the Greenland Kayak.
I take the essential lines and measurements with a thin batten wedged against the top of the the mortises on each gunwale and towards the narrowest width between them. As you can see the batten is not so wide as the mortise, and placed in this position can establish the point (where the pencil points) from which all of the necessary lines and markings can be taken. The lines drawn across each side of the batten also give the angle of the gunwales at this point, necessary for determining the angles of the tenons. I rub the lines out afterwards so that I do not get confused when doing the next beam.

These lines are measured with a bevel gauge as shown below, then the lines on the other side checked, and if different, the mean is taken between them. Shown below are most of the other tools required for this job the ruler and another bevel gauge fixed at the gunwale angle of 77 degrees (13 from vertical). I had forgotten to add the marking gauge set at the width of the mortise (1/4").
 This angle is then drawn twice - a gunwale thickness apart at one end of the deck beam. The edge of the tongue at the narrowest edge of the beam is determined by the line drawn at right angles from the drawn bevel to the corner of the tenon. You will notice that the tenon now starts about an eighth of an inch in from the edge. This width is scribed along the edge of the beam to the other end, and as shown in the next photo

the inner width of the beam marked off from the batten (just held for the photo like that!).
 Then the width of the mortise is marked from the top of the beam with the marking gauge (not shown) so that we can cut the thickness of the tenon, and the angle of the shoulder is now added to lines taken off the batten using the bevel gauge at 13 degrees.

The thickness of the tenon is then cut (if you use a band saw as shown below you will need to finish off with a handsaw because of the bevel resulting from the shape of the kayak).
 This cut can be seen below and the handsaw will be used to cut the edge of the shoulder.
 Then the tenon is trimmed. It doesn't need to be trimmed lengthwise; these can be trimmed from the assembled frame.
 If you look carefully you can see the tenon edges protruding.
 Finally after checking again that the frame is true from a stretched line down the centre by measuring half widths etc, the ends are lashed and trunnels (wooden pins) inserted as shown below.

At the stern a block is also inserted due to the wide angle at which the gunwales converge.

The trunnels are cut from a die. Normally the wood-stock is held firmly with the other hand as it is being hit through the die to stop it bending and breaking. I use oak for strength. (you can alternatively buy hardwood dowel)

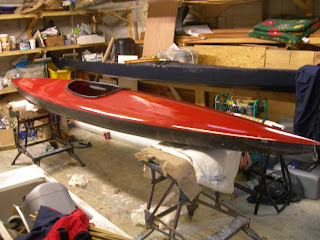
Finally with this kayak, which is being built in tandem with updating the computer design, the sheer of the finished structure is measured using a laser level, and then the design in the computer will be updated to reflect the actual sheer measured.

Two raised deck beams still need to be added and can wait until a later stage in construction. Pinning the tenons will be shown in the next post.
What is described below is what works for me. There are alternatives such as the elegant one described by Chris Cunningham in his book on Building the Greenland Kayak.


At the stern a block is also inserted due to the wide angle at which the gunwales converge.

The trunnels are cut from a die. Normally the wood-stock is held firmly with the other hand as it is being hit through the die to stop it bending and breaking. I use oak for strength. (you can alternatively buy hardwood dowel)

Finally with this kayak, which is being built in tandem with updating the computer design, the sheer of the finished structure is measured using a laser level, and then the design in the computer will be updated to reflect the actual sheer measured.

Two raised deck beams still need to be added and can wait until a later stage in construction. Pinning the tenons will be shown in the next post.
Comments
Post a Comment