Joining the two halves and popping out a boat
Joining the two halves
 This shows the two halves of the mould reunited before all twenty or so bolts were secured. Not only did this minimise the gap through which resin could drip but also helped to align the edges so that there was a smooth transfer from hull to deck without a step. Before doing this the excess gelcoat was removed from the flanges which were in turn given a coat of Mirror Glaze release wax and not polished.
Then the joined halves were put on edge, and a light fitted so as to see inside properly. A good vapour mask, and vacuum cleaner suction from inside the kayak were essential for a safe operation.
 The rough edges of the cockpit were covered with masking tape, inside the working area looked like this: There was a high concentration of styrene from the resin in there, which without the vacuum cleaner, the mask - a good one, did not really cope with.
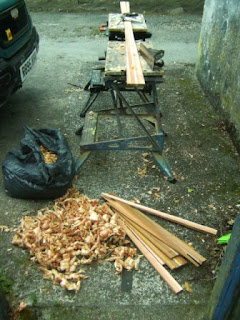
 Strips of chopped strand matt were wetted out on a board nearby and then put in place through a variety of means. The pieces right at the ends were simply transported there on a long stick - which was turned over to put the soggy tape in place, and then wetted into place with an angled brush secured to telescopic pole. You can see the poles used in the foreground of the picture below. Where possible
 strips were rolled into place from an old roller, having been rolled into place in reverse on the wetting out board. There is a double layer of strip in this boat - normal practice I believe.
Popping out a boat
Having undone all of the bolts a plastic squeege, normally used for spreading resin into glass weave was pushed into any gap that could be found between the flanges and then taken all the way round the edge until the two halves seemed to be moving - just a little. Then I used a pallette knife to work the smallest gap round the edge of the cockpit, and the two halves started to part.

 And then the deck released quite easily.
 The hatch cover inserts were removed, again with a squeege and palette knife so that there was
 something to pull on to pull the hull from it's mould. To start this process the squeege was taken round the edges of the mould:
 Because of the design of the mould, the hull had to be popped out backwards. Once the squeege had gone all the way round the hull, then the boat could be popped out, lifting through the rear hatch aperture. This was surprisingly easy.
 Much of the PVA skin would pull off, the rest was removed through washing with warm water.
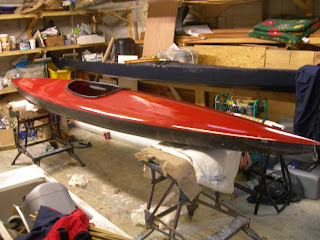
 to reveal the hull as shown. All of the subsequent work and difficulties would conspire to make this the conclusion of the easiest part of the process.
 The next post will be about cockpits bulkheads and finishing off.

Then the joined halves were put on edge, and a light fitted so as to see inside properly. A good vapour mask, and vacuum cleaner suction from inside the kayak were essential for a safe operation.


Popping out a boat
Having undone all of the bolts a plastic squeege, normally used for spreading resin into glass weave was pushed into any gap that could be found between the flanges and then taken all the way round the edge until the two halves seemed to be moving - just a little. Then I used a pallette knife to work the smallest gap round the edge of the cockpit, and the two halves started to part.


Comments
Post a Comment