The Slalom Project
What it's all about - a recap


This shows the inside of the hull part of the mould after about half a dozen sandings, mostly using a long former to help fair out the irregularities
 After rinsing, drying etc the best way to check for a smooth surface is with the hand
 This went on and on there must have been well over a dozen runs until I had something acceptable.
Hatches
In parallel with this the letterbox hatch recesses were developed

 This shows them coated with release agent.
Enlarging the cockpit
In order to do this I needed to fill out the area immediately behind the existing cockpit opening so that it could be extended backwards. The actual enlarging process would be completed in the first prototype, this was just the preparation to ensure this was possible.
 First of all a glass-fibre base plate was laminated on top of some PVA release agent so that it would be removable from the hull.
 Then some foam was stuck to this, cut and sanded roughly to shape, 6oz glass weave draped over as shown here, laminated, and then the major imperfections filled with car body filler
 and the process repeated probably half a dozen times (easier to do all the sanding etc out of the boat)
 Putting it all together
After the deck mould had waxed and polished three times with mirrorglaze mould polish, the deck mould was coated with PVA release agent on top of the wax (more about the actual process in the next post), and then the hatches recesses and fill in behind the cockpit secured with plastacine.
As this post will not accept any more photos, this will be shown on the next post.
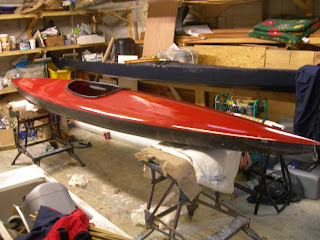
In February I showed this picture of the mould I obtained over the Christmas holiday.

Back in the 1960's and early 70's people used Slalom Kayaks, of the shape as shown above for everything, including use on the sea. This project re-visits this idea, but with an updated kayak that satisfies the safety requirements, convenience and handling of modern kayaks.
This has been beset with problems - all of my own making. The first being the state of the mould which I had not properly inspected on a very cold day, and the price was good; but I have since paid for any savings several times over with all of the hours I have had to put in to bringing the interior up to a sufficient finish to pop out a prototype.


Hatches
In parallel with this the letterbox hatch recesses were developed


Enlarging the cockpit
In order to do this I needed to fill out the area immediately behind the existing cockpit opening so that it could be extended backwards. The actual enlarging process would be completed in the first prototype, this was just the preparation to ensure this was possible.


After the deck mould had waxed and polished three times with mirrorglaze mould polish, the deck mould was coated with PVA release agent on top of the wax (more about the actual process in the next post), and then the hatches recesses and fill in behind the cockpit secured with plastacine.
As this post will not accept any more photos, this will be shown on the next post.

Comments
Post a Comment