Sewing the seams
Sewing the seams
I use a common brand of Sewing Awl - the "Speedy Stitcher"; it is made in the USA and readily available in the UK, particularly in Mail order Chandlers - there are many other types readily available on ebay for example. The seam consists of two halves, each rolled around a rope core sewn together under tension with the speedy stitcher.
Rolling the seam
There is an overlap of approximately one inch of fabric at the seam. Making the seam on top of a stringer, preferably raised to give "V" in the deck is easiest. If there is no stringer it is necessary to insert a temporary batten as the two halves of the seam need to be pinned in place before sewing. I deliberately make my stringers extra wide and of cedar to give a better platform, and easier to pin in to.
I have found a soft plaited rope core to work best, something like 5mm. Although a little more expensive I use polyester as I figure it will not rot and unlike nylon, bond properly when the coating is added. For many years I used household upholstery piping chord and that worked fine. The seam is started by simply rolling the rope core at the start of the seam. There is a knack to this, something you just need to start doing and you learn as you go along.


The two pictures show the start of a seam from the bow stern-wards. The excess fabric remaining at the bow was tidied up once I had established the seam by a foot or two towards the stern.
I big issue is which way to sew the seam. I started in the way shown as I had already sewn a bow pocket, which can be seen just above the clamp in place, however; as you will see in the next post, by working towards the centre from the ends, you can draw wrinkles into the centre of the hull. Some wrinkles are unavoidable, my aim is to have them all on the deck and none in the hull.
Another issue is which way to pull the fabric. Pulling perpendicular to the gunwales will tend to focus any slack into the centre of the boat - which you don't want. Therefore I try to keep pulling perpendicular to the centre seam, which sometimes does not seem natural.
Sewing
I find it works best to pin the seam about one foot at a time, sew and catch up, and repeat the process.
The sewing process starts by pushing the stitcher through the centre of the rolled seam- as is shown above, pulling through a good length of thread which will be threaded through the loop on that side of the seam. The needle is pulled out and reinserted 1cm or less along the seam; pushed right through as far as it will go and then pulled back slightly. You will then find it possible to pull a little slack from above (BUT NOT BELOW) the needle. The free end you have on that side is then inserted through the gap between the slack and the needle, so that it loops round the thread when the needle is withdrawn. When all is pulled tight you will have successfully have made a stitch.

This picture shows the seam being held firm as the needle is pushed through. Previous stitches through the centre of the seam are clearly visible.

This picture shows the thread being pulled from above the needle
 This picture shows the thread from the far side being fed through the loop created above the needle. It is doubled over as it then takes half the time to thread through the six foot or so of thread on the other side.
With regard to my comment earlier that you must not thread below the needle. My awl has a groove cut in the lower side of needle and it takes the thread from a spool inside the handle up to the eye at the end of the needle. If you thread underneath, you short circut the whole process and jam the stitching.
It is a good idea to make sure that the fabric is securely pinned at the beginning of the seam.
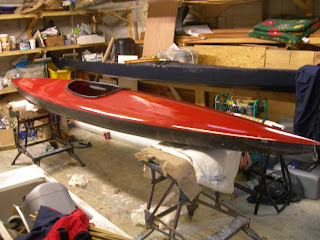
The finished seam ended up looking like this, but I was not happy with the wrinkles that remained in the centre of the hull - next post.

I use a common brand of Sewing Awl - the "Speedy Stitcher"; it is made in the USA and readily available in the UK, particularly in Mail order Chandlers - there are many other types readily available on ebay for example. The seam consists of two halves, each rolled around a rope core sewn together under tension with the speedy stitcher.
Rolling the seam
There is an overlap of approximately one inch of fabric at the seam. Making the seam on top of a stringer, preferably raised to give "V" in the deck is easiest. If there is no stringer it is necessary to insert a temporary batten as the two halves of the seam need to be pinned in place before sewing. I deliberately make my stringers extra wide and of cedar to give a better platform, and easier to pin in to.
I have found a soft plaited rope core to work best, something like 5mm. Although a little more expensive I use polyester as I figure it will not rot and unlike nylon, bond properly when the coating is added. For many years I used household upholstery piping chord and that worked fine. The seam is started by simply rolling the rope core at the start of the seam. There is a knack to this, something you just need to start doing and you learn as you go along.


The two pictures show the start of a seam from the bow stern-wards. The excess fabric remaining at the bow was tidied up once I had established the seam by a foot or two towards the stern.
I big issue is which way to sew the seam. I started in the way shown as I had already sewn a bow pocket, which can be seen just above the clamp in place, however; as you will see in the next post, by working towards the centre from the ends, you can draw wrinkles into the centre of the hull. Some wrinkles are unavoidable, my aim is to have them all on the deck and none in the hull.
Another issue is which way to pull the fabric. Pulling perpendicular to the gunwales will tend to focus any slack into the centre of the boat - which you don't want. Therefore I try to keep pulling perpendicular to the centre seam, which sometimes does not seem natural.
Sewing
I find it works best to pin the seam about one foot at a time, sew and catch up, and repeat the process.
The sewing process starts by pushing the stitcher through the centre of the rolled seam- as is shown above, pulling through a good length of thread which will be threaded through the loop on that side of the seam. The needle is pulled out and reinserted 1cm or less along the seam; pushed right through as far as it will go and then pulled back slightly. You will then find it possible to pull a little slack from above (BUT NOT BELOW) the needle. The free end you have on that side is then inserted through the gap between the slack and the needle, so that it loops round the thread when the needle is withdrawn. When all is pulled tight you will have successfully have made a stitch.

This picture shows the seam being held firm as the needle is pushed through. Previous stitches through the centre of the seam are clearly visible.

This picture shows the thread being pulled from above the needle

With regard to my comment earlier that you must not thread below the needle. My awl has a groove cut in the lower side of needle and it takes the thread from a spool inside the handle up to the eye at the end of the needle. If you thread underneath, you short circut the whole process and jam the stitching.
It is a good idea to make sure that the fabric is securely pinned at the beginning of the seam.
The finished seam ended up looking like this, but I was not happy with the wrinkles that remained in the centre of the hull - next post.


Comments
Post a Comment